The .NET nanoFramework is an interpreting execution engine of .NET IL code making it quite easy and accessible to write C# code for embedded systems and typical IoT devices like the popular ESP32 from Espressif and many other MCUs.
Huge advantage is the low level Platform and Hardware Abstraction Layer that make it possible to develop .NET based applications for a broad bandwidth of devices using the same APIs, language (e.g. C#) and tool chains.
In this case I’m going to use the ESP32 from Espressif as my micro-controller of choice. As C# is my favourite language and .NET my common work domain the .NET nanoFramework is the perfect starting point. Let’s go!
About the .NET nanoFramework
Before I go into the details of setting up our development environment and our device I recommend you to get some insights into what is and how the nanoFramework works.
First there is a helpful article from Laurent Ellerbach from Microsoft and who is also an active contributor on the Open Source nanoFramework where he goes into detail on how you run your own .NET application on a Micro Controller Unit (MCU).
Second I can recommend the following YouTube video from the Microsoft IoT channel to get an introduction to the nanoFramework.
Preparing the device
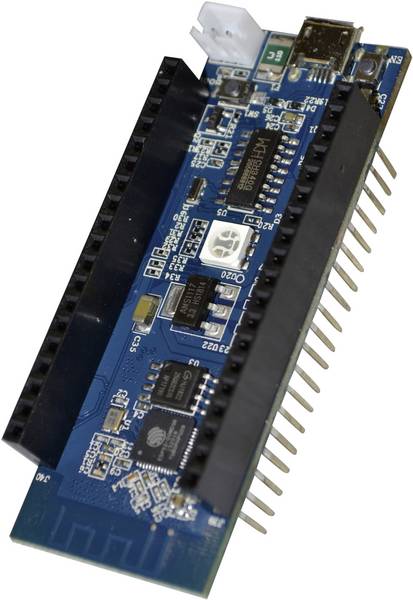
The ESP32 MCU is available on many different boards. In my case I got the nodeESP development board that was included in a study starter kit from Franzis (a German publishing company). On this board the MCU is based on the ESP32-D0WD Dual Core processor and is WROOM32 compatible.
Because of the used USB to serial converter (CH340) I needed to install a specific driver to make the connection via USB work. In case you need the driver I uploaded it here.

So now we need to upload the .NET nanoFramework firmware to our board. In this case it’s the ESP32_WROOM_32_BLE firmware reference which is compatible to our variant of the ESP32. BLE stands for Bluetooth Low Energy as the MCU also offers Bluetooth functionality via a PCB antenna.
To upload the image to our board we can use the nano Firmware Flasher (nanoff). We can install this application as a .NET global tool with the following command:
dotnet tool install -g nanoffNow the flasher tool is globally available and we can proceed to install the desired image on our device:
nanoff --serialport COM6 --target ESP32_WROOM_32_BLE --update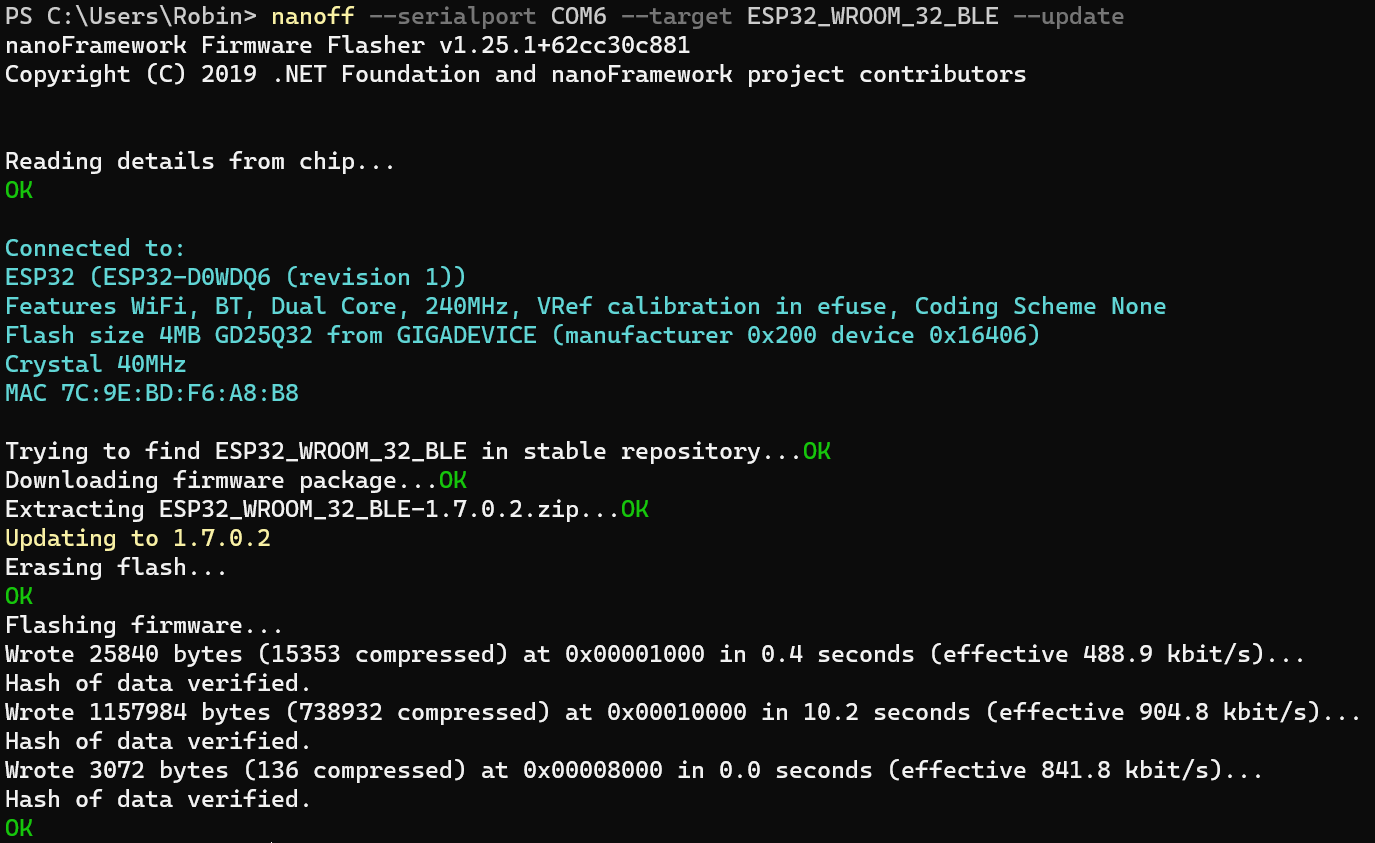
Configuring Visual Studio 2019
In the next step we are going to install the nanoFramework extension for Visual Studio. This extension is directly integrated into the IDE and offers additional functionality to engage with our connected board.
To install select the menu Extensions -> Manage Extensions then select Online and search for nanoFramework.

After the installation you will be prompted to restart Visual Studio.
As we already installed the matching firmware on our device it’s already possible to connect to it via the Device Explorer that comes with the extension. You can find it under the menu View -> Other Windows -> Device Explorer.
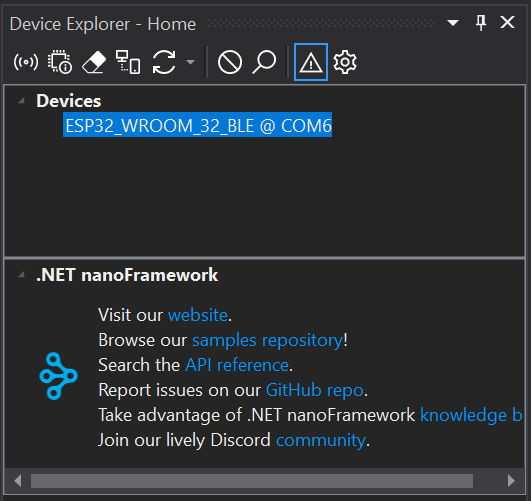
In the Output window selecting the .NET nanoFramework Extension pane it’s also possible to gain further information which is being logged.
From now on we are ready to code and deploy our first application.
Make the LED blink
With the following sample application we just control our device to make its green LED blink in a regular interval of 1 second.
To start we create a new project in Visual Studio by selecting the “Blank Application (nanoFramework)” template.
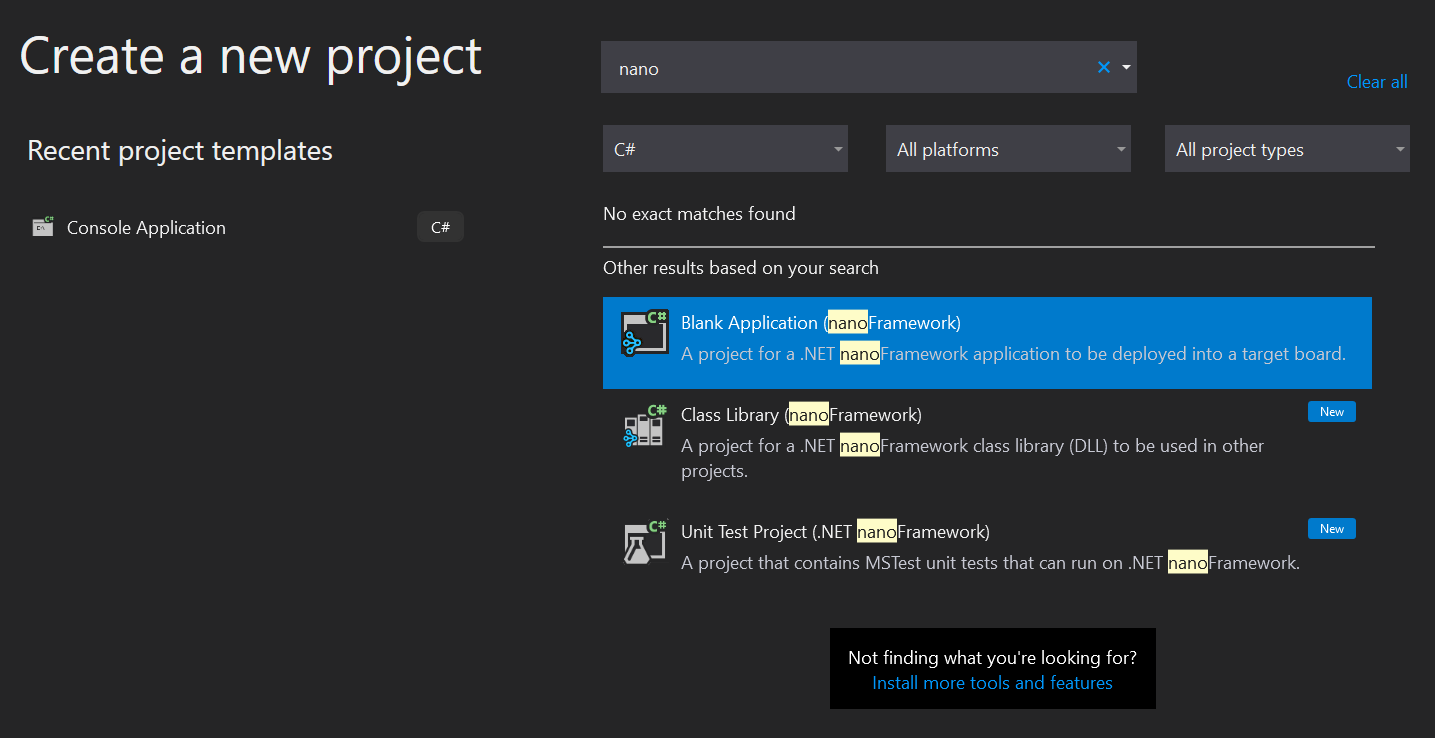
After that we get the default boilerplate with a Program.cs file where we can replace the content with the following code:
using System;
using System.Device.Gpio;
using System.Diagnostics;
using System.Threading;

namespace nodeESP.Blink
{
    public class Program
    {
        public static void Main()
        {
            var gpioController = new GpioController();

            // open pin 2 which controlls the green LED
            var ledPin = gpioController.OpenPin(
                2,
                PinMode.Output);

            // high value indicates switch off
            ledPin.Write(PinValue.High);

            var timeSpan = TimeSpan.FromSeconds(1);
            while (true)
            {
                // toggle LED on/off
                ledPin.Toggle();
                Thread.Sleep(timeSpan);
            }
        }
    }
}
I also made the complete source code available here on GitHub.
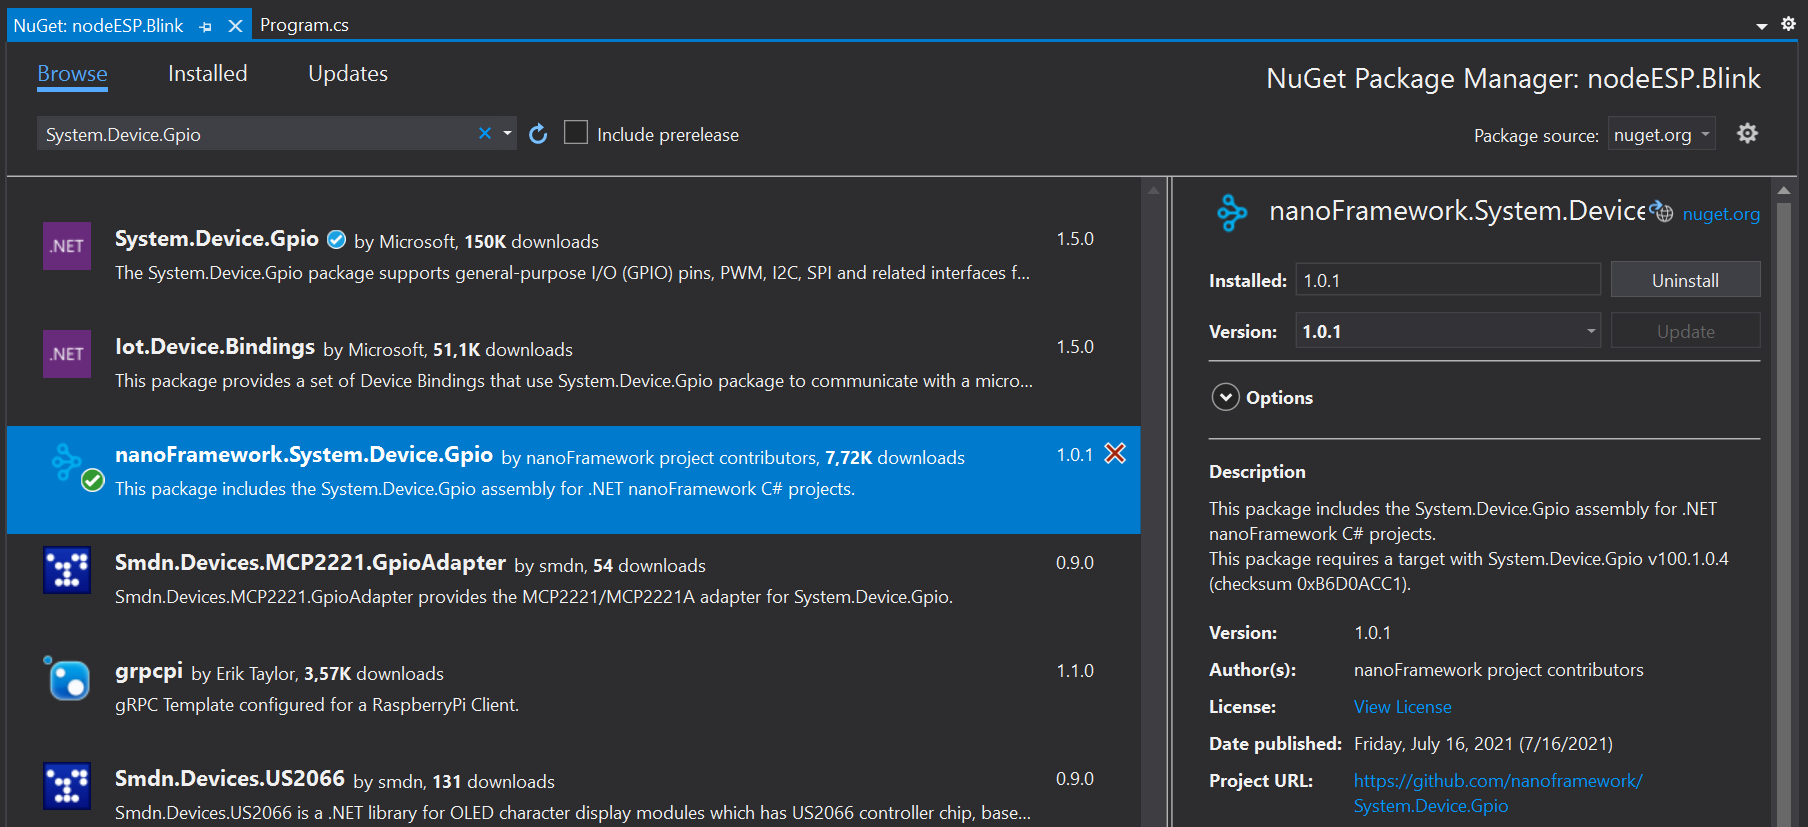
Because we are using an API to access a GPIO pin we need to make sure to add a the System.Device.Gpio NuGet package.
When you are looking for that package in the NuGet Package Manager you will find a match from Microsoft IoT. This package requires the full .NET runtime which may be available on IoT devices like a Raspberry Pi.
But as we are using nanoFramework which is supporting our “little” ESP32 we have to look for the respective package with the name nanoFramework.System.Device.Gpio. All packages with that prefix are supporting the nanoFramework runtime.
To make sure that we are accessing the correct pin we have to refer to the appropriate board pin-layout. Normally every board manufacturer provides that piece of documentation.
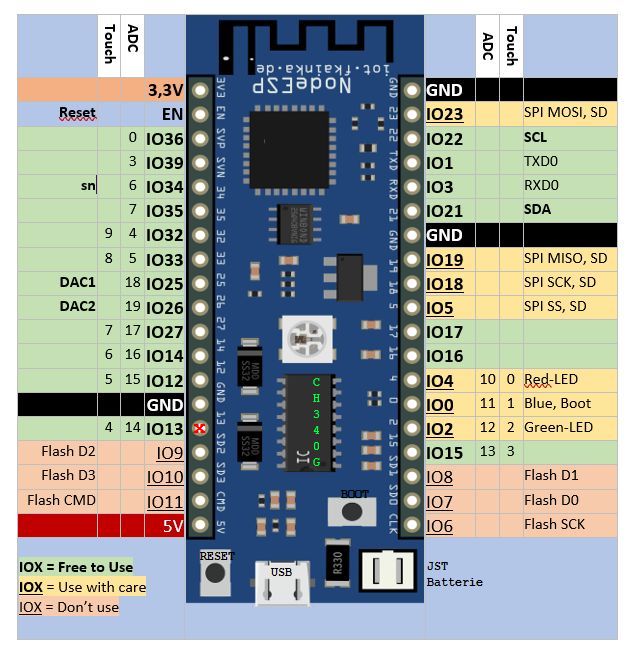
In the case of the nodeESP development board the green LED can be controlled by accessing IO pin number 2.
After a manual build (Strg+B) there should be no error indication left and we are ready to deploy the application on our development board.
To do that we just press F5 to deploy the package and attach the Visual Studio debugger to it. By setting a break point we can even debug the code as usual – but in this case it is running directly on the MCU device instead of the local machine.
If you prefer to to just deploy the application you can choose Deploy via the context menu of the project.
Conclusion
Getting started with the nanoFramework is really straight forward and was quite a joy for me being used to .NET and C# development in general. It’s quite exciting to get hands on some “hardware” instead of writing code that runs on some anonymous virtual machines.
Also the documentation of the framework is quite helpful. I mostly orientated this article on the original getting started guide.
Most of the time I spent by searching for the appropriate documentation for my not so common nodeESP development board. I needed to make sure that I choose the correct firmware, got the USB connection working and finally choose the right IO pin. So now everything seems to be prepared.
I’m looking forward to dig deeper into the IoT rabbit hole. My next plan is to access a temperature sensor.
I hope you found some useful information in this article.
Nice article, thanks!
Hi Robin G,
This is very helpful. Good effort.
Did you have a chance to access the temperature sensor using nanoframework?
Please let me know if you found.
Looks like we need to update and read registry addresses.
Thanks
Waikil
Hi Waikil,
thanks for your feedback!
Unfortunately I didn’t proceed any further by tinkering around with my ESP32 board. Hopefully I will find some time for that in the near future!
But I’m sure you can find other tutorials that write about accessing a temperature sensor. Here is an example utilizing a BMP280 temperature sensor on an ESP32 with nanoframework: https://github.com/nanoframework/Samples/tree/main/samples/AzureMQTTTwinsBMP280Sleep
An here the detailed article about the whole thing: https://devblogs.microsoft.com/dotnet/show-dotnet-running-my-net-nanoframework-for-8-years-on-a-battery/